

Gnumeric · Printing and PDF output · Beginner
Set a Print Area and Fit One Page in Gnumeric
Choose a Gnumeric print range, set one-page scaling, repeat headings when needed, and verify readable printer or PDF output.
Print-area command and one-page/multi-page PDF output verified in Gnumeric 1.12.57 · Editorial standards
Select the cells and use File → Print Area & Breaks → Set Print Area, then choose Automatic scaling with horizontal and vertical limits of 1 page. Always inspect the preview: fitting a sheet onto one page is useful only if the text remains readable.
Scope and practice layout
The 30-row example was tested on 2026-10-16 in Gnumeric 1.12.57, Debian 13.6 Linux, English interface/C locale. Both actual PDF exports were inspected page by page. The manual and official 1.12.62 source were also reviewed; 1.12.62 was not the tested runtime. Physical printing, other printers and reopening the saved workbooks were not tested. The preview viewer was unavailable in this runtime, so verification used the exported PDFs instead of claiming a successful Print Preview. Print-dialog tabs also depend on the GTK printing system and selected printer.
Download 30 synthetic orders (CSV). It preserves the practice layout of at least 30 rows with Date, Customer, Item, Quantity, Unit Price, and Total columns. Import into A1:F31. The date strings are synthetic ISO-style labels; their exact date conversion is not needed for this printing exercise.
The quantities repeat 1 through 5 six times, the unit price is 2.50, and the Total column contains numeric values. In E32 enter Grand total and in F32 enter =SUM(F2:F31), expected 225.00. Widen columns enough to show the headings and customer names. The CSV contains no print settings.
Set the exact printed range
- Select A1:F32 on the worksheet, then choose File → Print Area & Breaks → Set Print Area. Open File → Page Setup → Print Area to check the displayed range. This includes the 30 records and the grand total, but excludes scratch work to the right.
- In Page, choose the actual paper size and a suitable orientation, initially Landscape for this wide table. Review margins; printable space depends on the printer.
- In Print Area, set Rows to repeat on the upper region to 1:1 if headings should repeat when the report spans pages. A row range is required: enter
1:1, not1. Leave repeated columns empty unless they are needed. - Apply settings to the intended current sheet, rather than accidentally applying them to every sheet in the workbook.
Native correction: merely typing A1:F32 into the Page Setup print-area field did not apply it in the tested 1.12.57 run: the saved print-area name remained invalid and an initial preview included scratch cells. The selection/menu command above established the actual saved range $A$1:$F$32. Do not treat visible text in that field as proof that scope was applied. Inspection of the official 1.12.57 dialog source corroborates that it loads the field but does not fetch it when committing Page Setup.
Select a screenshot to open the full-size image.
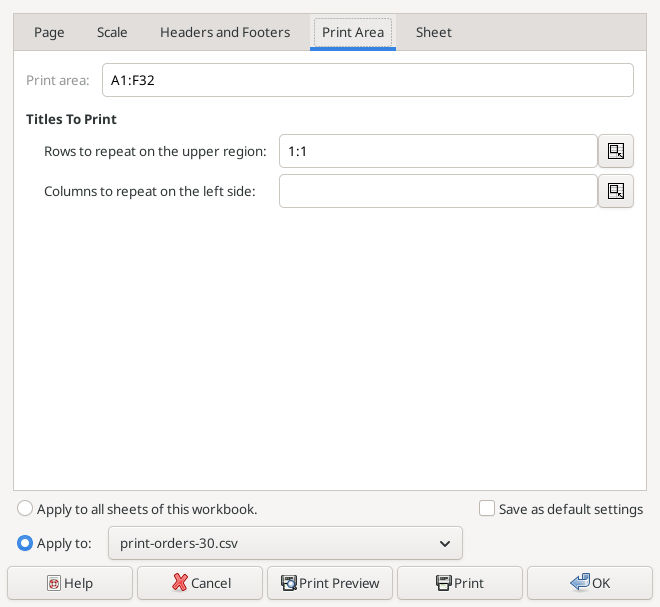
Actual settings after using the menu command, with row 1 repeated.
Fit the report onto one page
- On the Scale tab choose Automatic scaling.
- Enable Scale to fit horizontally on and set it to 1 page.
- Enable Scale to fit vertically on and set it to 1 page.
- Confirm Page Setup and open File → Print Preview if a suitable viewer is available. Otherwise export a PDF as below and inspect it. Check the page count, all six columns, all 30 records, the headings and grand total. The native run verified the PDF route because its preview viewer was unavailable.
These two checked dimensions are different from fixed percentage scaling. They ask the print layout to fit the defined area within a one-by-one page limit; they do not guarantee readable text, identical output on every printer, or preservation of arbitrary manual page breaks.
If the preview is too small, return to Scale, keep the horizontal limit at 1, and clear the vertical-fit checkbox to allow more pages down the sheet. Repeat row 1 and inspect subsequent pages. In the tested example, this produced two pages with 10 pt table text, rather than one page with approximately 7.37 pt text. The second page repeated the six headings. This was the more readable of the two outputs.
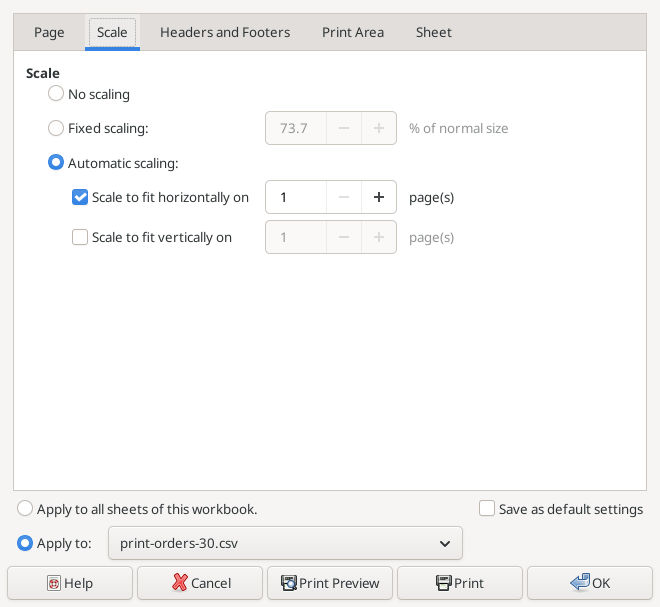
The tested width-only alternative allows additional pages vertically.
Print or create a PDF
- Open File → Print. In the tested Gnumeric Print Range tab, choose Active workbook sheet and leave Current selection only and Ignore defined print area unchecked. Printing a selection or the entire workbook can change the scope relative to the configured sheet area.
- To make a PDF, choose the available print-to-file destination, select PDF, and supply an appropriate filename and folder. The documented GTK workflow also supports PostScript; ensure PDF is actually selected.
- After creating the file, open it and inspect every page. A successful save is not proof that the right cells or readable font sizes were printed.
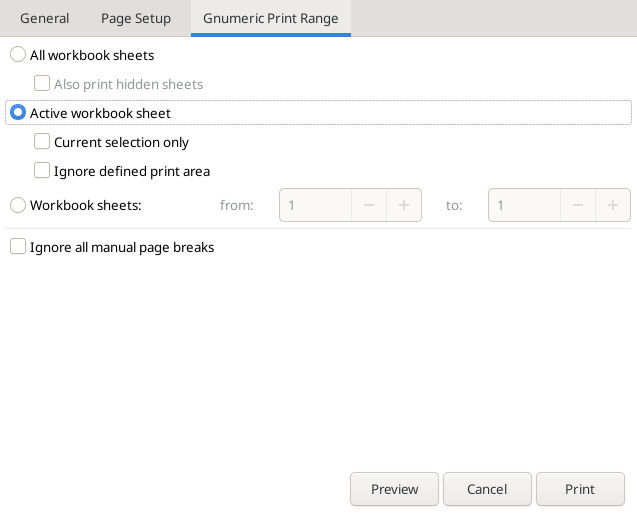
Actual PDF scope controls used for this example.
Verified output and practice files
The final exports both contain all 30 records, all six complete headings and the 225.00 grand total; scratch checks in H:I are excluded. Both use A4 landscape. AutoFit the bold heading cells as well as the data before exporting: the first attempt clipped Quantity even though its full text remained extractable from the PDF.
- One-page PDF, paired with its saved native workbook: horizontal 1 and vertical 1, one page, approximately 7.37 pt table text. This demonstrates fitting, not a recommendation to print small text.
- Width-only PDF, paired with its saved native workbook: horizontal 1, vertical limit cleared, two pages at 10 pt. Page 1 contains 22 records; page 2 repeats the headings and contains the remaining 8 records and total.
The workbook pairs preserve the respective settings used for each export. They were saved and inspected, but not reopened in this test. The PDFs were rendered and visually checked as exported files; the screenshots above are genuine application captures, not PDF renders.
Preflight and troubleshooting
- Extra blank pages: inspect the print area, manual page breaks and unexpectedly formatted distant cells before shrinking everything further.
- Missing columns or totals: compare the configured range with A1:F32 and check the Print dialog’s range selection.
- Headings disappear on page 2: configure row repetition. Freezing row 1 on screen is a separate feature and does not establish print repetition.
- Numbers look clipped or show placeholders: adjust cell widths and number formats before judging scaling.
- Unwanted content: review the Page Setup Sheet options for grid lines, row/column headings, comments and other content, and inspect chart/object/formula output in the actual preview.
- Different printer output: recheck paper size, margins and printer-specific settings. A screen sheet view is not a print preview.
Expected data checks are 30 numeric totals, 90 units and 225.00 grand total. Page layout remains a native visual check, not something those arithmetic results verify. Keep the Gnumeric workbook to preserve the print setup; the PDF is an output copy.
See SUM and COUNT for the data checks.
Official references
- Page Setup.
- Printing to a printer or file.
- Official tested-version 1.12.57 source:
src/dialogs/dialog-printer-setup.c, especiallyload_print_area,do_setup_page_area, anddo_fetch_page_info, supports the print-area correction above. - Official 1.12.62 source:
src/dialogs/print.uianddialog-printer-setup.cestablish the automatic-scaling, horizontal/vertical fit, print-area and repetition controls.